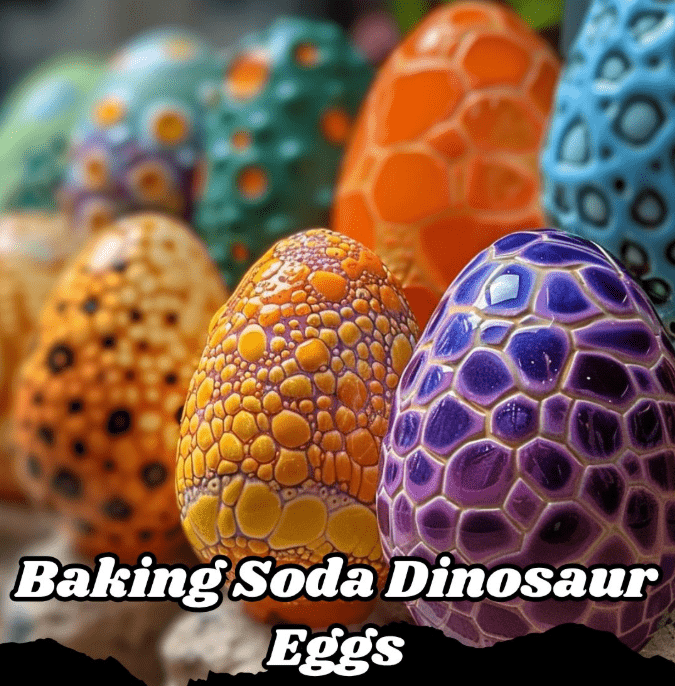
Baking Soda Dinosaur Eggs – A Fizzy and Fun Science Craft for Kids
Looking for a hands-on activity that’s both educational and exciting? Baking Soda Dinosaur Eggs are the perfect blend of science, creativity, and sensory play. These fizzy eggs are easy to make at home and deliver an unforgettable reveal when they “hatch” in vinegar. Whether you’re planning a themed birthday party, a rainy-day activity, or a classroom experiment, this simple craft will captivate curious minds and spark endless excitement. Let’s explore how to make these DIY dinosaur eggs and all the fun ways to play with them.
Table of Contents
Ingredients
To create your own Baking Soda Dinosaur Eggs, you’ll need the following simple ingredients:
- Baking soda
- Vinegar
- Water
- Plastic dinosaurs
- Food coloring (optional)
These items are inexpensive, safe for children, and commonly found around the house or at any grocery store. The combination of baking soda and vinegar creates the chemical reaction responsible for the fun fizzing effect, while the water helps bind the mixture into a dough-like consistency.
Instructions
- Prepare the Baking Soda Mixture
Begin by adding a generous amount of baking soda to a mixing bowl. Start with at least 1 to 2 cups if you plan to make multiple eggs. - Add Color (Optional)
To make the eggs more visually exciting, mix in a few drops of food coloring. Choose fun, dinosaur-inspired colors like green, blue, or purple. Stir until the color is evenly distributed. - Form a Dough
Slowly pour in water while stirring. You’re aiming for a moldable dough, similar to playdough or wet sand. If the mixture is too dry, add a bit more water, one teaspoon at a time. - Shape the Dino Eggs
Take a small amount of the mixture and flatten it slightly. Place a plastic dinosaur in the center and carefully shape the mixture around it to form an egg. Continue shaping and smoothing until it resembles a real egg. - Use a Mold for Extra Fun
If you have silicone molds or plastic egg containers, use them to get more consistent shapes. Simply press the mixture into the mold around the dinosaur toy, then remove it gently. - Dry the Eggs
Place the formed eggs on a tray lined with parchment paper and let them dry for about 24 hours. Air drying is best, but if you’re short on time, a fan can help speed up the process. - Time to Hatch
Once the eggs are dry and hard, it’s time for the big reveal. Drop them into a bowl of vinegar or use a spray bottle or pipette to apply vinegar directly to the surface. The eggs will start fizzing and dissolving right before your eyes. - Break Open the Egg
As the reaction softens the egg, kids can help break it open with their hands or tools to reveal the hidden dinosaur inside. It’s an exciting and interactive surprise that encourages exploration.
Benefits of This Craft
Baking Soda Dinosaur Eggs offer far more than just entertainment. Here are several educational and developmental benefits:
- Encourages STEM Learning: This craft introduces basic chemistry concepts like acid-base reactions in a fun, hands-on way.
- Promotes Sensory Play: Mixing, shaping, and watching the fizzing action engages touch, sight, and sound.
- Boosts Creativity and Imagination: Kids can design colorful eggs, create stories around their dinosaurs, and imagine prehistoric adventures.
- Develops Fine Motor Skills: Molding the eggs and manipulating tools during the hatching process helps with hand-eye coordination.
- Inspires Independent Play: Once made, the eggs can be used again and again for solo play or group activities.
Tips
To make your dino egg experience even better, consider these useful tips:
- Use gloves if using food coloring to prevent staining little hands.
- Use silicone molds for consistent egg shapes and easy removal.
- Let kids help with the process—from mixing the dough to hiding the dinosaurs, involving them keeps them more engaged.
- Store vinegar in squeeze bottles for easy application, especially when multiple children are playing at once.
- Place the eggs on a tray when hatching to contain the mess and make clean-up easier.
What Taste Look Like?
While these baking soda eggs are not edible, the fizzing vinegar and baking soda combination gives them a bubbly texture and slightly tangy scent. The colorful shells make them look almost like candy or Easter eggs, but it’s important to remind children that these are strictly for play and not food. The visual effect is delightful and very similar to a miniature science experiment happening in real time.
How to Store
You can prepare the eggs in advance and store them easily:
- Before hatching: Keep dried dinosaur eggs in an airtight container or ziplock bag in a cool, dry place. They’ll last for weeks as long as they’re not exposed to moisture.
- Avoid humid environments: Excess humidity can cause the baking soda to absorb moisture and lose its effectiveness.
- After hatching: Discard the remaining shell fragments and rinse the plastic dinosaurs so they can be used again for another round of egg-making.
Baking Soda Dinosaur Eggs combine fun, learning, and creativity in one unforgettable DIY activity. From the moment you mix the baking soda to the fizzy hatching reveal, this craft provides hands-on excitement that delights kids of all ages. It’s a great project for families, classrooms, and even party settings, offering hours of educational play with minimal prep and cleanup. Plus, the sense of anticipation and wonder when the dinosaurs emerge makes this one of the most magical crafts you can create at home.
To keep the inspiration going, explore More DIY craft ideas on our blog and discover other exciting projects that turn everyday items into fun and educational activities for kids.
FAQ
Can I use baking powder instead of baking soda?
No. Baking soda is essential for creating the fizzy reaction with vinegar. Baking powder won’t react the same way.
Can these eggs be made without food coloring?
Yes. The food coloring is optional and used purely for aesthetic purposes.
How long do the eggs take to dry?
Typically, the eggs dry in about 24 hours. You can speed up the process by placing them near a fan or in a warm, dry area.
What age group is this craft best for?
This activity is best suited for children ages 3 and up with adult supervision during the hatching process.
Are the materials safe?
Yes. All the materials used are non-toxic. However, supervision is recommended, especially for younger children to ensure they don’t try to eat the eggs.
Baking Soda Dinosaur Eggs – A Fizzy and Fun Science Craft for Kids
- Total Time: 24 hrs (drying time)
- Yield: 4–6 dino eggs
Description
Make fizzy, fun Baking Soda Dinosaur Eggs—hide toy dinos inside for an exciting science-meets-play surprise!
Ingredients
– Baking soda
– Vinegar
– Water
– Plastic dinosaurs
– Food coloring (optional) These items are inexpensive, safe for children, and commonly found around the house or at any grocery store. The combination of baking soda and vinegar creates the chemical reaction responsible for the fun fizzing effect, while the water helps bind the mixture into a dough-like consistency.
Instructions
1. Prepare the Baking Soda Mixture: Add 1–2 cups of baking soda to a mixing bowl.
2. Add Color (Optional): Mix in a few drops of food coloring for colorful eggs. Stir until evenly combined.
3. Form a Dough: Slowly add water while stirring until the texture is moldable like wet sand.
4. Shape the Dino Eggs: Flatten some mixture, place a plastic dinosaur in the center, and shape the mixture around it to form an egg.
5. Use a Mold (Optional): Use silicone molds or plastic egg containers to shape and smooth the eggs.
6. Dry the Eggs: Place eggs on a tray lined with parchment and let them air dry for about 24 hours. Use a fan to speed up if needed.
7. Time to Hatch: Drop the dry eggs into vinegar or spray with vinegar to start the fizzy eruption.
8. Break Open the Egg: As the egg softens, help kids open it to reveal the hidden dinosaur inside!
Notes
Add glitter for extra sparkle or essential oils for a subtle scent. Store dried eggs in an airtight container until ready to use.
- Prep Time: 15 mins
- Cook Time: 0 mins
- Category: Kids Craft
- Method: Hands-On + Chemical Reaction
- Cuisine: Non-edible
Nutrition
- Serving Size: N/A
- Calories: 0
- Sugar: 0g
- Sodium: 0mg
- Fat: 0g
- Saturated Fat: 0g
- Unsaturated Fat: 0g
- Trans Fat: 0g
- Carbohydrates: 0g
- Fiber: 0g
- Protein: 0g
- Cholesterol: 0mg